We wrote Carbide Create from scratch to give our customers the quickest path from idea to part.
Combine the power of 2D sketching and machining with 3D simulation to see your designs come to life on your CNC router!
Check out Carbide Create Pro if you need 3D design and machining or if you don't have a Carbide 3D machine.
Contains the specific motherboard diagrams and teardown steps. These are often shared on the Acer Community Forums If you are looking for a specific BIOS update to support newer hardware or having trouble with RAM compatibility
LGA 1155 (Supports 2nd Gen Intel Core "Sandy Bridge" i3/i5/i7) 4x DDR3 DIMM slots (Dual-channel support) Expansion 1x PCIe x16, 1x PCIe x1, 2x PCI slots Storage SATA III (6.0 Gb/s) and SATA II ports Form Factor ⌨️ BIOS & Boot Operations
3rd Gen "Ivy Bridge" CPUs (e.g., i7-3770) generally fail without custom BIOS mods. TDP Limit: Stick to 95W processors or lower. RAM Configuration Populate slots 1 and 3 first for dual-channel performance. Use unbuffered, non-ECC DDR3 memory.
This public link is valid for 7 days and shares a thread, including any personal information you added. This link or copies made by others cannot be deleted. If you share with third parties, their policies apply. Can’t copy the link right now. Try again later. acer q65h2am v11 manual updated
: VGA and DVI-D (some variants may include a DisplayPort).
: Several BIOS revisions exist (ranging from 2011 to 2012), which can sometimes be found via archives like The Retro Web Solid build quality for office or light home server use. Compact Micro-ATX form factor fits most cases. Includes four RAM slots, which was generous for its era. computerstoreberlin.de Limited to older "Sandy Bridge" CPUs. Lacks native USB 3.0 on most revisions.
The Acer Q65H2AM V11 is a 24-inch monitor that boasts a stunning Quad HD resolution of 2560 x 1440 pixels. With a 16:9 aspect ratio and a response time of 4ms, this monitor is perfect for fast-paced games, video editing, and other graphics-intensive activities. The monitor also features a wide viewing angle of 178°/178°, ensuring that the image remains clear and vibrant even when viewed from the side. RAM Configuration Populate slots 1 and 3 first
Move the plastic jumper cap from pins 1-2 (Default position) to pins 2-3 (Clear position). Wait: Wait exactly 15 to 20 seconds. Return Jumper: Move the jumper cap back to pins 1-2.
Older BIOS versions on this motherboard frequently cause a black screen ("No Signal") or a hang on the Acer splash screen when upgrading to modern UEFI graphics cards (such as the GTX 10-series, RX 500-series, or newer). Upgrading to the latest official Acer BIOS unlocks "Launch Video OpROM" configurations or native UEFI modules that fix this bug.
Critical for system stability and business management features. This link or copies made by others cannot be deleted
If you are using an updated manual or service guide for this board, look for these critical layout details: Front Panel Connector (F-PANEL) : The pinout is often non-standard. : HDD LED (observe polarity). : Reset Switch. : Power Switch. SATA Ports : These are color-coded for speed. Black Connectors : SATA II (standard for HDDs). Red Connector
Locate the 3-pin jumper labeled CLR_CMOS near the coin-cell battery. Move the plastic jumper cap from pins 1-2 to pins 2-3. Wait 15 seconds, then return the jumper to pins 1-2. Plug the system back in and power it on.
The Acer Q65H2AM V11 manual update provides users with the latest information on the features, specifications, and usage of the motherboard. The updated manual includes new configuration options, improved troubleshooting information, and updated BIOS information. Users of the Acer Q65H2AM V11 motherboard are recommended to review the updated manual to ensure they are taking full advantage of the motherboard's capabilities.
The Q65 chipset natively supports processors.
The Acer Q65H2AM V11 is a versatile and feature-rich monitor designed to cater to the diverse needs of users. Whether you're a gamer, a professional, or simply someone who spends a lot of time on their computer, this monitor has something to offer. In this article, we'll take a closer look at the Acer Q65H2AM V11 manual, which has been updated to provide users with the most comprehensive and up-to-date information on how to get the most out of their monitor.
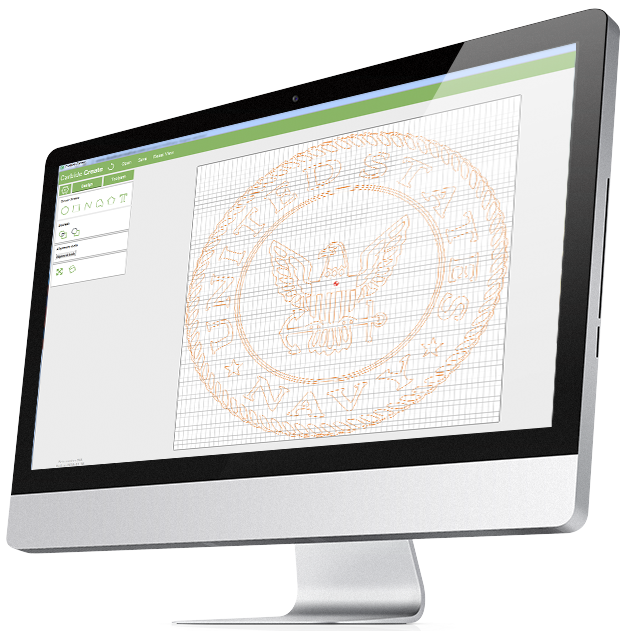
Carbide Create includes all the design tools to start your design from a blank page. If you're familiar with programs like Adobe Illustrator or Corel Draw, you'll feel right at home in Carbide Create.
If you already have a design in another program, you can import it and start from there.
No matter how you start, you'll be able to create designs that are as detailed as you want them to be.
Click here to see how much detail Carbide Create can handle.
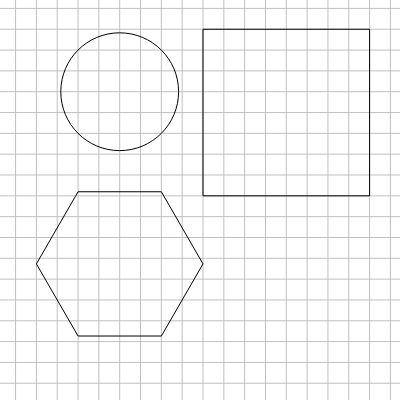
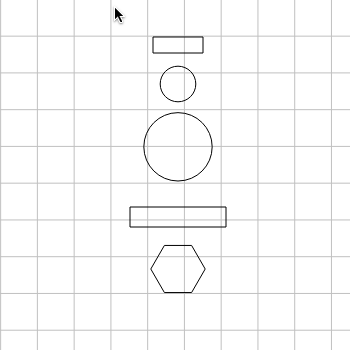
Carbide Create lets you quickly create basic shapes like squares, circles, polygons, and polylines.
For new users, this is a fast way to experiment with new ideas and techniques.
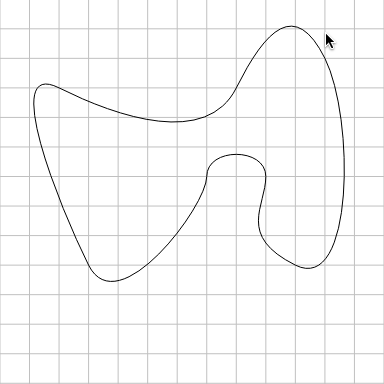
Create smooth, organic shapes with bezier spline tools.
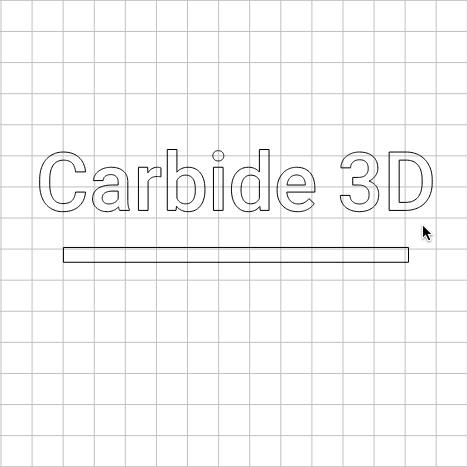
Create text vectors from any font on your computer.
Text can be created in a straight line, or along an arc.
Carbide Create lets you load a background image so you have a reference for your design.
Whether you're looking to just make sure the parts are in proportion or you need to carefully trace an image, having a reference image will speed up your design cycle.

If you need to make parts that fit perfectly, the alignment tools in Carbide Create will help you put all the sections of the design in the correct locations.
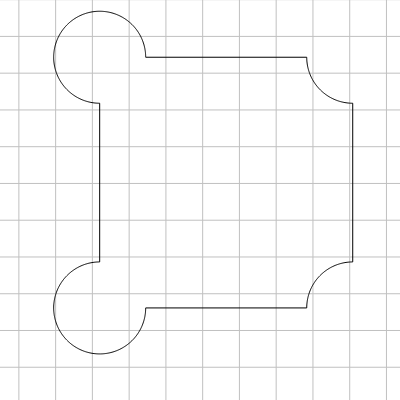
Booleans are an incredibly powerful way to combine simple shapes into more complex ones, so you don't have to create them from scratch.
Carbide Create supports all of the common boolean modes, including weld, unions, intersections, and subtractions.
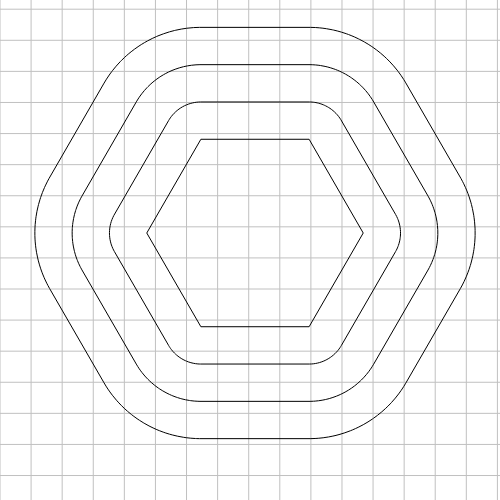
Vector offsets allow you to select a vector or shape and create a copy that's offset by some distance from the original one. You can offset to the inside or outside.
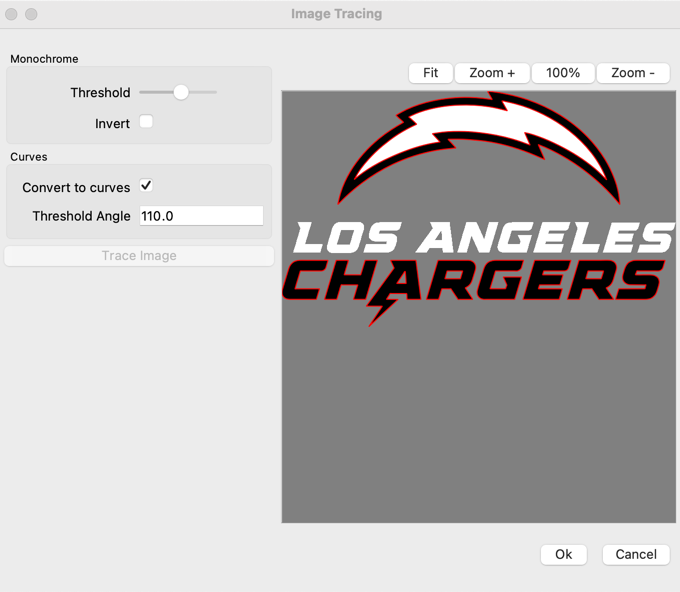
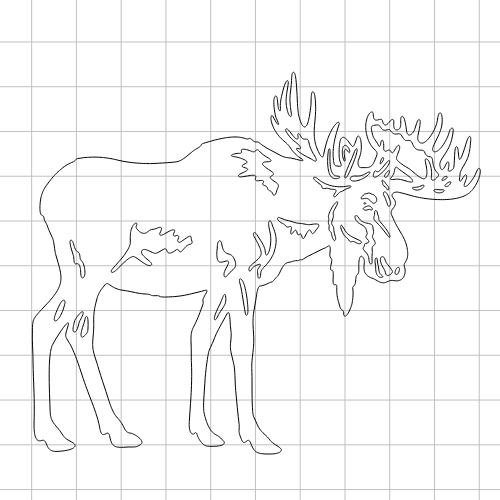
If you have artwork in an image format, Carbide Create can trace that image and convert it to vectors that are ready to cut.
This tracing function was designed from the gound up to work with CNC routers, so it creates simple, clean vectors that are easy to machine, not connected shapes that require a lot of editing.
If you need to start your design from another program or file, you can load SVG and DXF files directly into Carbide Create.
If your design is already done and you just need to create toolpaths, that's no problem- load your file and start creating toolpaths.
Carbide Create includes our full bundle of Design Elements for use in your projects.
Don't waste time hunting the Internet for the perfect SVG file, they're right here in Carbide Create.

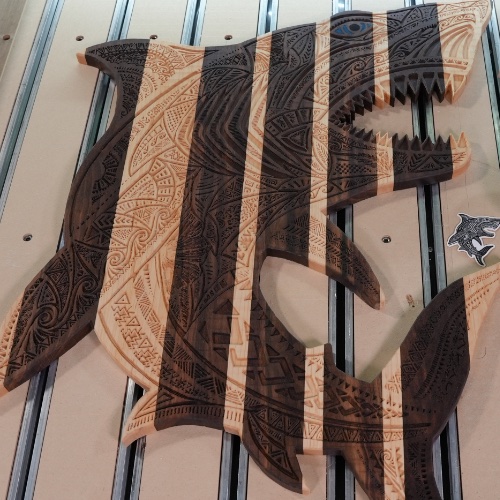
Once you have your design done, you'll need to create toolpaths so your CNC router can cut out the design.
Carbide Create has all the common toolpath options to cut your project, from simple 2D cutouts to detailed multi-tool designs.
If you'll looking for more advanced 3D projects, we've got that covered in Carbide Create Pro.
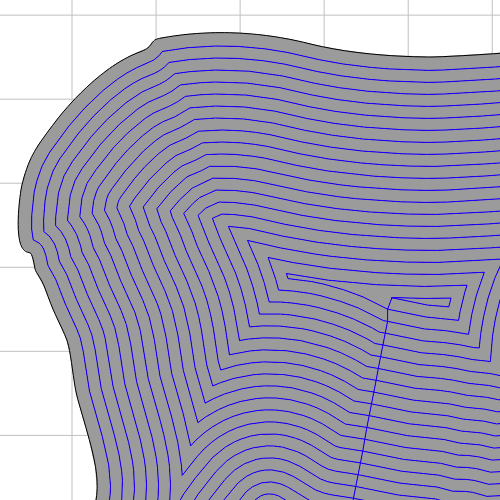
Pockets and contours are the basic operations in any machining job and they're included in Carbide Create.
Pocket toolpaths clear the area inside of a vector, while contours cut along the inside or outside of a vector. These operations are the basis for most machining jobs.
V-carving is a quick way to create designs with a lot of depth and detail, while giving your projects a 3D-look.
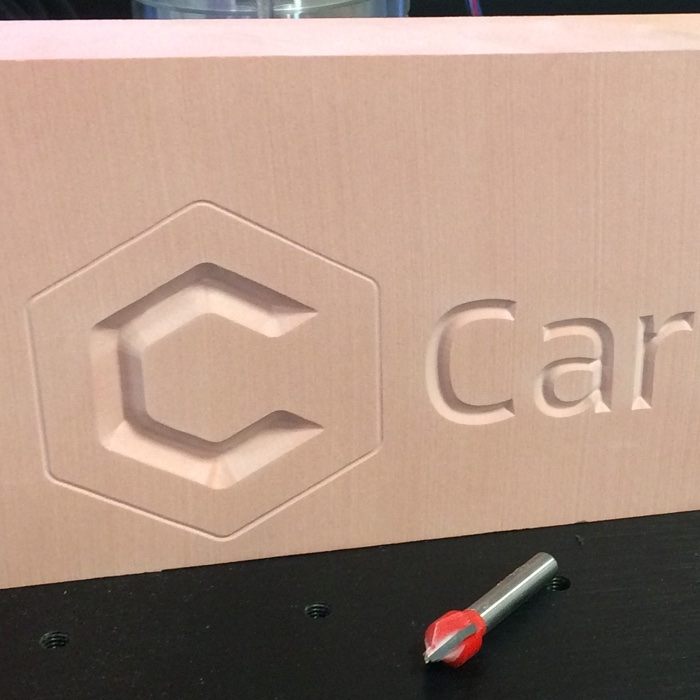
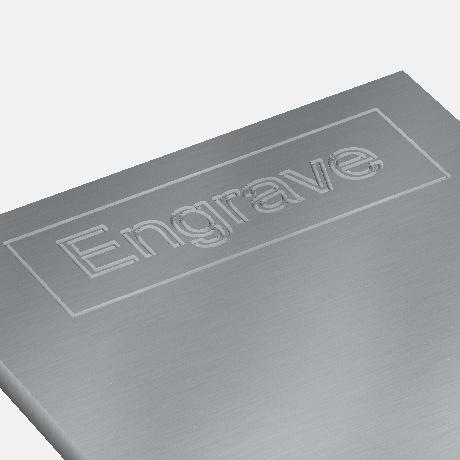
Engrave text, or any other vectors, directly into your project.
Additional engraving options are available in Carbide Create Pro.
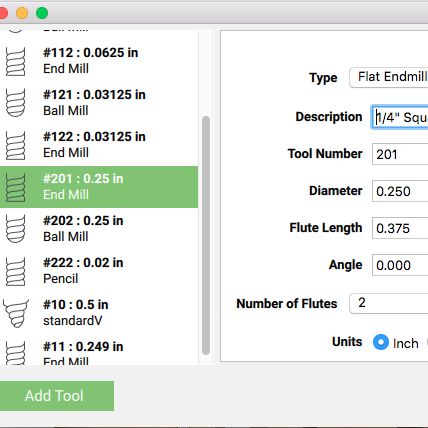
Keep a library of all of your favorite cutting tools ready to go.
All of the tools in the Carbide 3D tooling store are included in the tool library, so you can quickly select the right tool for the job.
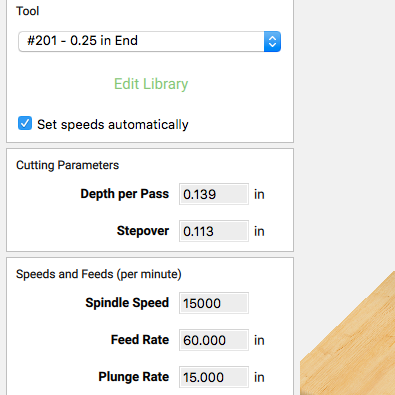
Carbide Create includes speeds and feeds for many common cutters and materials, so you don't have to figure them out on your own.
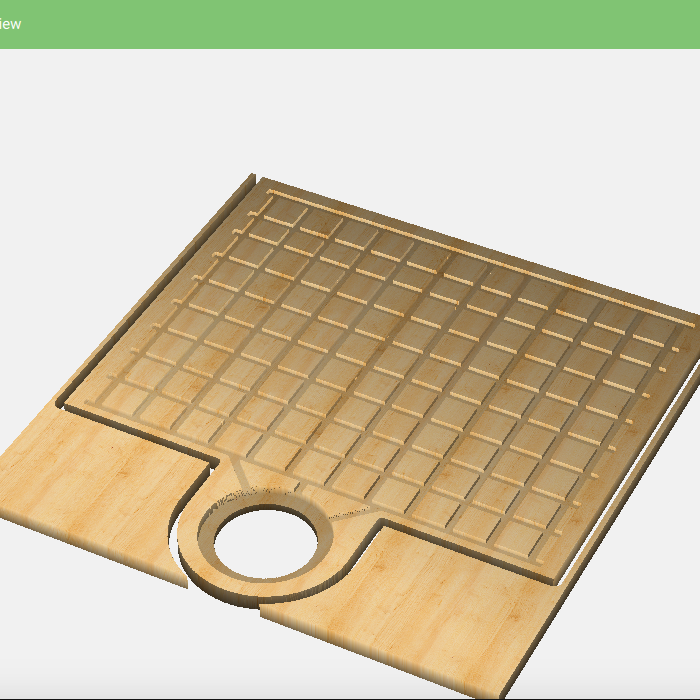
See what you're going to get before you even walk up to your machine, saving you time and material.
Carbide Create is a great way to go for 2D and 2.5D CAD/CAM. If you need 3D toolpaths then we've got two options for you.
Carbide Create is included with all Carbide 3D machines.
To use Carbide Create with a non-Carbide 3D machine, you'll need a license for Carbide Create Pro.
Carbide Create runs only on Mac and Windows computers.
No, Carbide Create runs locally on your machine, it's not a cloud application.
We'll keep you up to date on new things in the world of Carbide 3D, and CNC in general.